Customer Web Settings
Located in Web Settings > Customer Settings

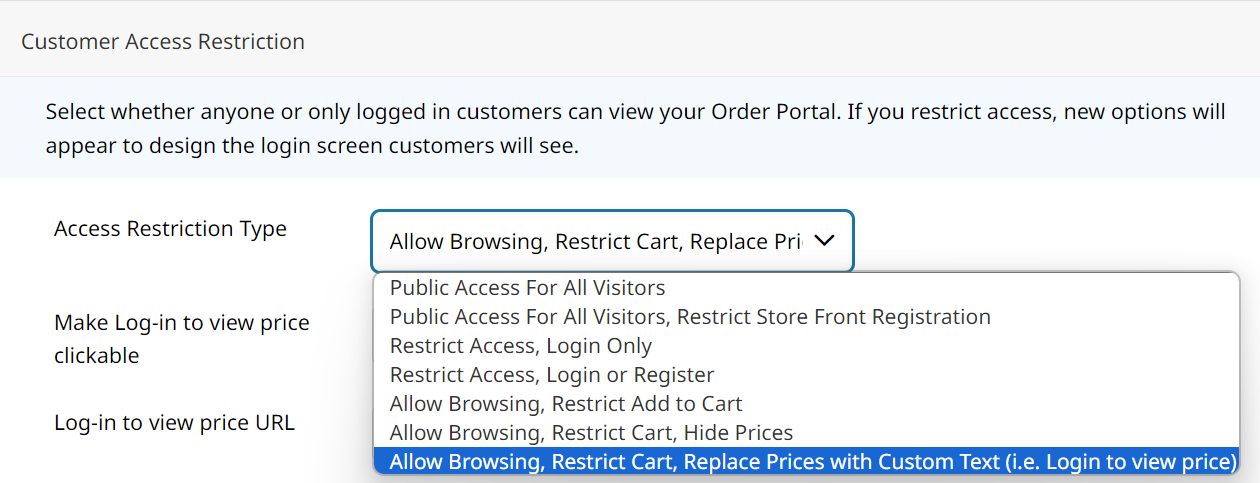
Customer Access Restriction
Initially set to "Public" meaning anyone can access your website, Customer Access Restrictions allow you:
- Completely block access to your store to anyone who does not have an account
- Completely block access but allow users to register for an account
- Allow users to browse your store, but restrict adding to cart to logged-in users only
- Allow users to browser your store but restrict adding to cart and hide product prices until the user is logged in.

Access Restriction Type
Specify if your website will be Public or Restricted by one of the rules in this drop-down setting.
- Logo
If you restrict your website to login or login/register, this setting allows you to upload a custom logo that will be used on the login screen. - Background Image
If you restrict your website to login or login/register, this setting allows you to upload a custom background image that will be used on the login screen. - Message
If you restrict your website to login or login/register, this message will appear below the logo and above the login form - Success Message
If you restrict your website to login or login/register, this message will appear after a user has successfully signed in.
Account Request/Registration
Require new customers or only B2B customers to be approved by the store administrator.
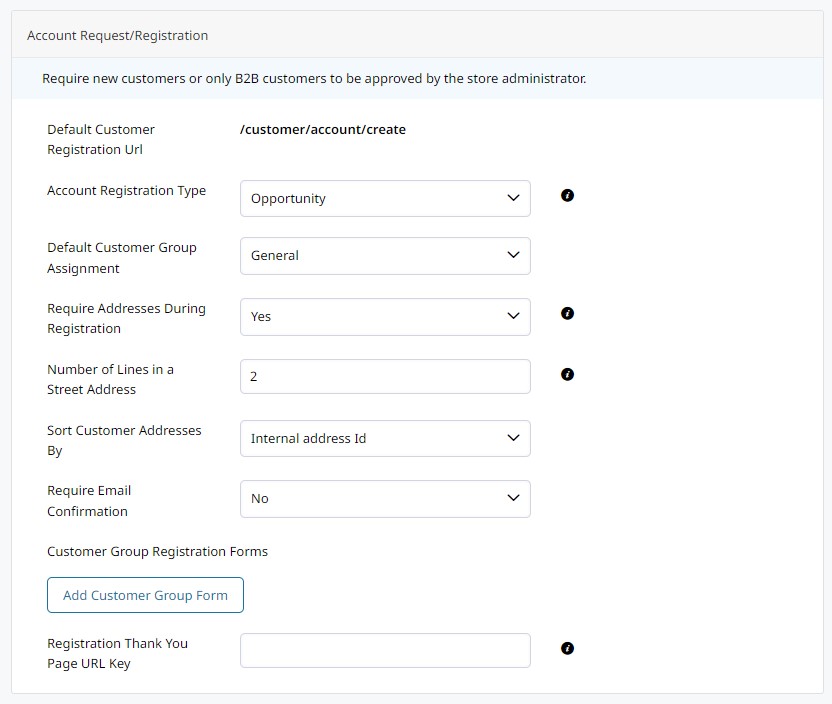
- Account Registration Type
When a customer requests an account they can be created as a Contact, or as a Lead and Contact, or Opportunity and Contact. If you do not require account approval you can also have the registration create an Account and Contact. - Require Registration
Opportunities and Leads have their own workflow built-in for review and approval.
YES or NO - Require Approval will show only if you have the form creating a Contact. This setting will hide when Account Registration Type is Opportunity or Lead.
- Send Email Alert for Pending Registrations
Yes or No - Configure email settings for registration approval in Settings > Emails - Default Group
This will be the Customer Group assigned to the customers registering. - Number of Lines in a Street Address
Leave empty for default (2). Valid range: 1-4 - Sort Customer Addresses By
Sort customer addresses in the order they were entered, or alphabetically by Name, Company, Street, City, State etc... - Require Email Confirmation
Yes/No - this setting specifies if the user will need to confirm their email address (using a confirmation link sent to them after registering) before they can log-in.
Permissions
- Allow Customers to Add Addresses
When set to Yes customers will be able to add new addresses to their address book. If set to No and no addresses exist the customer will be unable to checkout. Guest Checkout will still allow users to enter any address. You can disable Guest Checkout under Setup->Checkout Settings - Allow Customers to Edit Addresses
When set to Yes customers will be able to edit existing addresses in their address book - Allow Customers to Delete Addresses
When set to Yes customers will be able to delete existing addresses in their address book - Show Newsletter Registration Checkbox during Account Creation
Yes or No. - Require Addresses During Registration
If enabled, address will be assigned as the Default Billing and Default Shipping address for the customer.
Login Options
- Redirect Customer to Account Dashboard after Logging in
Yes or No - Customer will stay on the current page if "No" is selected. - Force Expire Password
Never or every 30/60/90/180/360 Days customers will be forced to reset their password.
Customer Group Settings
- Restrict Customer Groups to Specific Languages & Currencies
Yes or No - If using multi-language or multi-currency, you may restrict Customer Groups to specified language and currency. - Enable Group Specific Sales Increment IDs
Yes or No - Setting to YES will allow you to configure custom Order, Invoice, Credit Memo or Shipment ID numbers for users assigned to this customer group.
Net Terms
- Disable Net Terms When Orders are Past Due
Yes or No - Setting to Yes will give you a Past Due Day Limit option in which Net Terms will not be available to the Customer. They will have to select a Payment Method at checkout. - Prevent All Orders From Past Due Accounts
When the above setting is set to Yes, Customers with past due orders will not be allowed to place new orders until the past due Invoices are paid. - Past Due Day Limit
Enter the number of days past the net terms days to consider the Invoice past due. - Auto-Create Invoice with Order Submit
Yes or No - When set to Yes, Invoice will be created when a net terms order is submitted. - Send Invoice Email
Yes or No - When set to Yes, Invoice email will be sent when the invoice is created with order submit. - Default Customer Net Terms Details and Default Account Net Terms Details
This is the Term Detail text displayed in the Checkout.
Newsletter Settings

This will then display a checkbox that allows users to sign-up for your newsletter when they checkout on the last step before submitting the order. Email addresses will be added to Customers>Subscribers and can be synchronized with 3rd party services such as MailChimp, Constant Contact and so forth.
Please note in accordance with anti-spam regulations, this checkbox cannot be preselected by default. The user must check it off.
Updated about 2 hours ago